本文介绍第一部分,web 框架。
目前比较出名的 web 框架有
接下来主要介绍一下 actix-web,其他框架待后面有时间再介绍。
actix-web
actix-web 服务端的逻辑都是建立在 App 实例上的,通过 App 实例为所有资源和中间件注册路由,存储同一范围内所有线程共享的状态。
接下来从零开始实现一个 actix-web 示例。
- 创建rust 工程
cargo new hello-world
- Cargo.toml 添加依赖
[dependencies]
actix-web="4"
- 使用 actix-web
在 src/main.rs 中编写如下代码
use actix_web::{get, post, web, App, HttpResponse, HttpServer, Responder};

#[get("/")]
async fn hello() -> impl Responder {
    HttpResponse::Ok().body("Hello world!")
}

#[post("/echo")]
async fn echo(req_body: String) -> impl Responder {
    HttpResponse::Ok().body(req_body)
}

async fn manual_hello() -> impl Responder {
    HttpResponse::Ok().body("Hey there!")
}


#[actix_web::main]
async fn main() -> std::io::Result<()> {
    HttpServer::new( || {
        App::new()
            .service(hello)
            .service(echo)
            .route("/hey", web::get().to(manual_hello))
    })
        .bind(("127.0.0.1", 8099))?
        .run()
        .await
}
HttpServer 绑定到 ip、端口,同时,提供了两个 get 方法(/,/hey),一个 post 方法(/echo),通过浏览器访问 localhost:8099 即可访问。

HttpServer
HttpServer 接受的参数类型是 application factory,实现了 Send + Sync。
bind,为 server 绑定 ip 和端口。
bind 成功后,HttpServer::run() 返回一个 server 实例。
server 必须使用 await 或者在多线程中才能启动 http 服务器。
server 默认启动的线程数与 CPU 个数相等,可以通过 HttpServer::workers() 改变线程数。
scope
scope 相当于请求路径的前缀
#[actix_web::main]
async fn main() -> std::io::Result<()> {
    HttpServer::new(|| {
        App::new().service(
            web::scope("/app")
                .route("/hey", web::get().to(manual_hello)),
        )
    })
        .bind(("127.0.0.1", 8099))?
        .run()
        .await
}
这样的话在请求 localhost:8099/hey 就请求不到了,这样要请求的路径是 localhost:8099/app/hey
Shared Mutable State
相当于全局变量、多个线程之间共享的。
web::Data<T>,T 是 Arc 类型。
Arc 和 Mutex 结合使用,实现在多线程间共享数据。
use std::sync::Mutex;

use actix_web::{App, HttpServer, web};

struct AppStateWithCounter {
    counter: Mutex<i32>, // <- Mutex is necessary to mutate safely across threads
}

async fn index(data: web::Data<AppStateWithCounter>) -> String {
    let mut counter = data.counter.lock().unwrap(); // <- get counter's MutexGuard
    *counter += 1; // <- access counter inside MutexGuard

    format!("Request number: {counter}") // <- response with count
}

#[actix_web::main]
async fn main() -> std::io::Result<()> {
    // Note: web::Data created _outside_ HttpServer::new closure
    let counter = web::Data::new(AppStateWithCounter {
        counter: Mutex::new(0),
    });

    HttpServer::new(move || {
        // move counter into the closure
        App::new()
            .app_data(counter.clone()) // <- register the created data
            .route("/", web::get().to(index))
    })
        .bind(("127.0.0.1", 8099))?
        .run()
        .await
}
浏览器请求 localhost:8099,每次刷新 counter+1;
返回 json
一般 web 应用服务端接口返回的数据都是 json 格式,
actix-web 中如何实现返回 json格式的数据:
cargo.toml添加依赖
serde = { version = "1.0", features = ["derive"] }
serde_json = { version = "1.0.2", optional = true }
main.rs
use actix_web::{App, get, HttpResponse, HttpServer, post, Responder, web};
use actix_web::web::Json;
use serde::{ser, Serialize};

#[derive(Serialize)]
pub struct JsonSuccess<T: ser::Serialize> {
    pub code: u32,
    pub data: Option<T>,
    pub error: Option<String>,
}

#[derive(Serialize)]
pub struct JsonError {
    pub code: u32,
    pub data: Option<String>,
    pub error: Option<String>,
}

pub fn success<T: ser::Serialize>(r: Option<T>) -> HttpResponse {
    HttpResponse::Ok().json(JsonSuccess {
        code: 0,
        data: r,
        error: None,
    })
}

pub fn error(err: Option<String>) -> HttpResponse {
    HttpResponse::Ok().json(JsonError {
        code: 1,
        data: None,
        error: err,
    })
}


#[get("/")]
async fn hello() -> HttpResponse {
    success(Option::from("Hello"))
}


#[actix_web::main]
async fn main() -> std::io::Result<()> {
    HttpServer::new(|| {
        App::new()
            .service(hello)
    })
        .bind(("127.0.0.1", 8099))?
        .run()
        .await
}

接收请求参数
Path
use actix_web::{App, get, HttpResponse, HttpServer, post, Responder, web,Result};
use actix_web::web::Json;
use serde::{ser, Serialize};

/// extract path info from "/users/{user_id}/{friend}" url
/// {user_id} - deserializes to a u32
/// {friend} - deserializes to a String
#[get("/users/{user_id}/{friend}")] // <- define path parameters
async fn index(path: web::Path<(u32, String)>) -> HttpResponse {
    let (user_id, friend) = path.into_inner();
    success(Some(format!("Welcome {}, user_id {}!", friend, user_id)))
}

#[actix_web::main]
async fn main() -> std::io::Result<()> {
    HttpServer::new(|| App::new().service(index))
        .bind(("127.0.0.1", 8099))?
        .run()
        .await
}
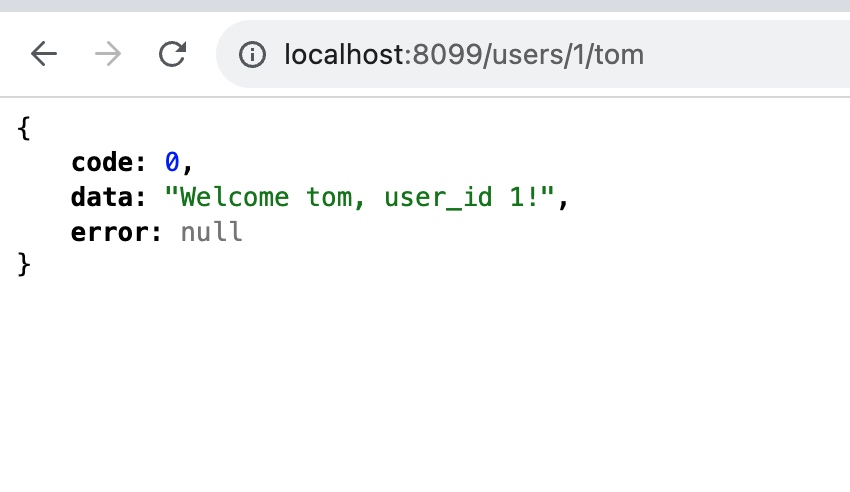
web::Path<(u32,String)> 接收这个 get("/users/{user_id}/{friend}") 请求的两个参数
将这两个参数定义为 struct 也是可以的
#[derive(Deserialize)]
struct Info {
    user_id: u32,
    friend: String,
}

/// extract path info using serde
#[get("/users/{user_id}/{friend}")] // <- define path parameters
async fn index(path: web::Path<(u32, String)>) -> HttpResponse {
    let (user_id, friend) = path.into_inner();
    success(Some(format!("Welcome {}, user_id {}!", friend, user_id)))
}
get 请求,接收参数
#[derive(Deserialize)]
struct Info {
username: String,
age:i32
}
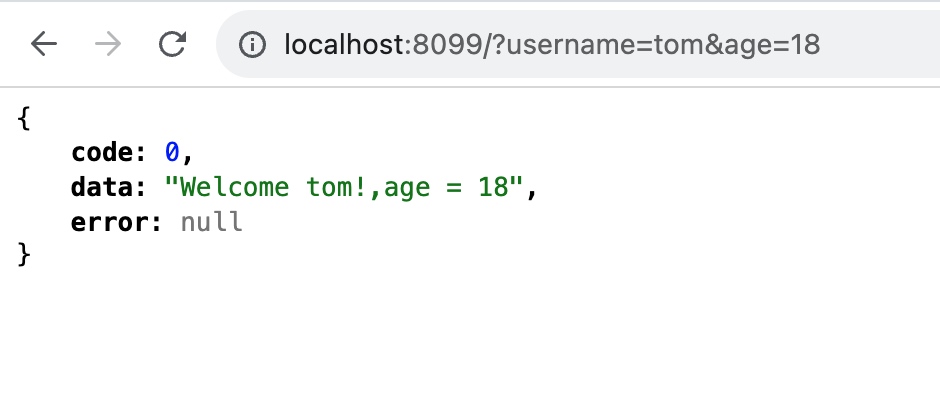
#[get("/")]
async fn index(info: web::Query<Info>) -> HttpResponse {
success(Some(format!("Welcome {}!,age = {}", info.username,info.age)))
}
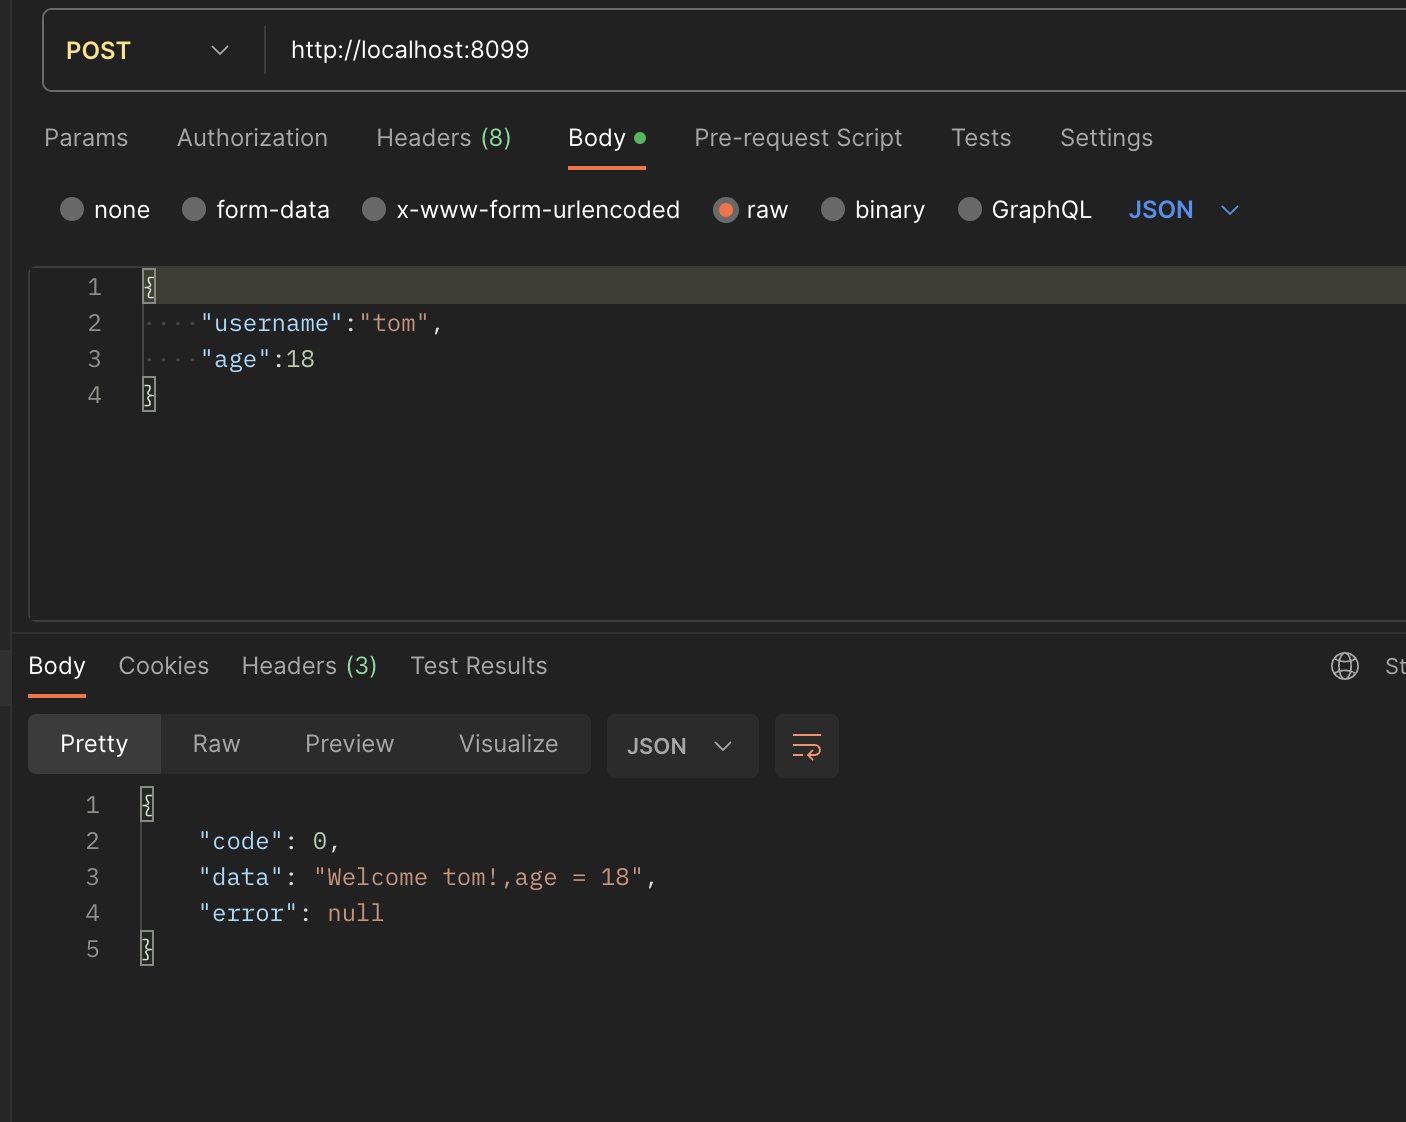
post 请求,接收 json
#[derive(Deserialize)]
struct Info {
    username: String,
    age:i32
}

#[post("/")]
async fn index(info: web::Json<Info>) -> HttpResponse {
    success(Some(format!("Welcome {}!,age = {}", info.username,info.age)))
}
middleware
middleware 系统可以让我们针对请求或者响应添加自定义操作。
- Pre-process the Request:可以在请求时做前置处理
- Post-process a Response:在响应时做后置处理
- Modify application state:修改 state
- Access external services (redis, logging, sessions):访问外部服务
如果有多个中间件,后添加的会先执行。
类似 Java 中的 AOP,只不过这个中间件只是针对 Controller 的。
自定义 middleware 要实现 Service和 Transform 两个 trait。
先用 wrap_fn 做一个简单的 middleware:
cargo.toml添加依赖
futures-util = "0.3"
main.rs
#[get("/{name}")]
async fn hello(path:web::Path<String>) -> HttpResponse {
let name = path.to_owned();
success(Option::from(format!("Hello {}",name)))
}
#[actix_web::main]
async fn main() -> std::io::Result<()> {
HttpServer::new(|| {
App::new()
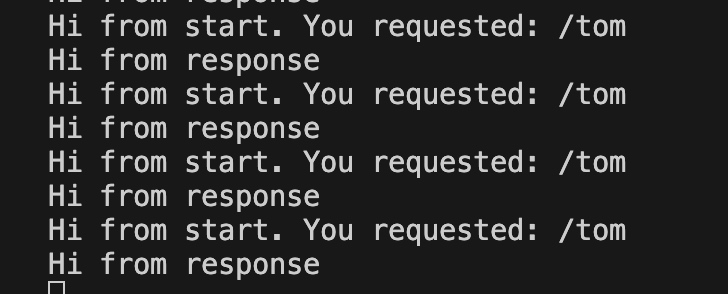
.wrap_fn(|req, srv| {
// Pre-process the Request
println!("Hi from start. You requested: {}", req.path());
srv.call(req).map(|res| {
// Post-process a Response
println!("Hi from response");
res
})
})
.service(hello)
})
.bind(("127.0.0.1", 8099))?
.run()
.await
}
请求 http://localhost:8099/tom
控制台会打印出
接下来,做一个比较常见的中间件--鉴权中间件。
impl<S, B> Service<ServiceRequest> for AuthMiddleWare<S>
where
    S: Service<ServiceRequest, Response = ServiceResponse<B>, Error = Error>,
    S::Future: 'static,
    B: 'static,
{
    type Response = ServiceResponse<B>;
    type Error = Error;
    type Future = LocalBoxFuture<'static, Result<Self::Response, Self::Error>>;

    forward_ready!(service);

    fn call(&self, req: ServiceRequest) -> Self::Future {
        let value = HeaderValue::from_str("").unwrap();
        let token: &HeaderValue = req.headers().get("token").unwrap_or(&value);
        if token.len() > 0 || req.path().to_string() == "/login" {
            let fut: <S as Service<ServiceRequest>>::Future = self.service.call(req);
            Box::pin(async move {
                let res = fut.await;
                res
            })
        } else {
            Box::pin(async move { Err(ErrorUnauthorized("PLEASE LOGIN")) })
        }
    }
}


#[actix_web::main]
async fn main() -> std::io::Result<()> {
    HttpServer::new(|| {
        App::new()
            .wrap(middleware::timed::Timed)
            .wrap(middleware::auth::Auth)
            .service(hello1)
            .service(hello2)
    })
        .bind(("127.0.0.1", 8099))?
        .run()
        .await
}
这里是写了两个 middleware,一个打印接口耗时,一个鉴权,代码篇幅较多,放在了 github。
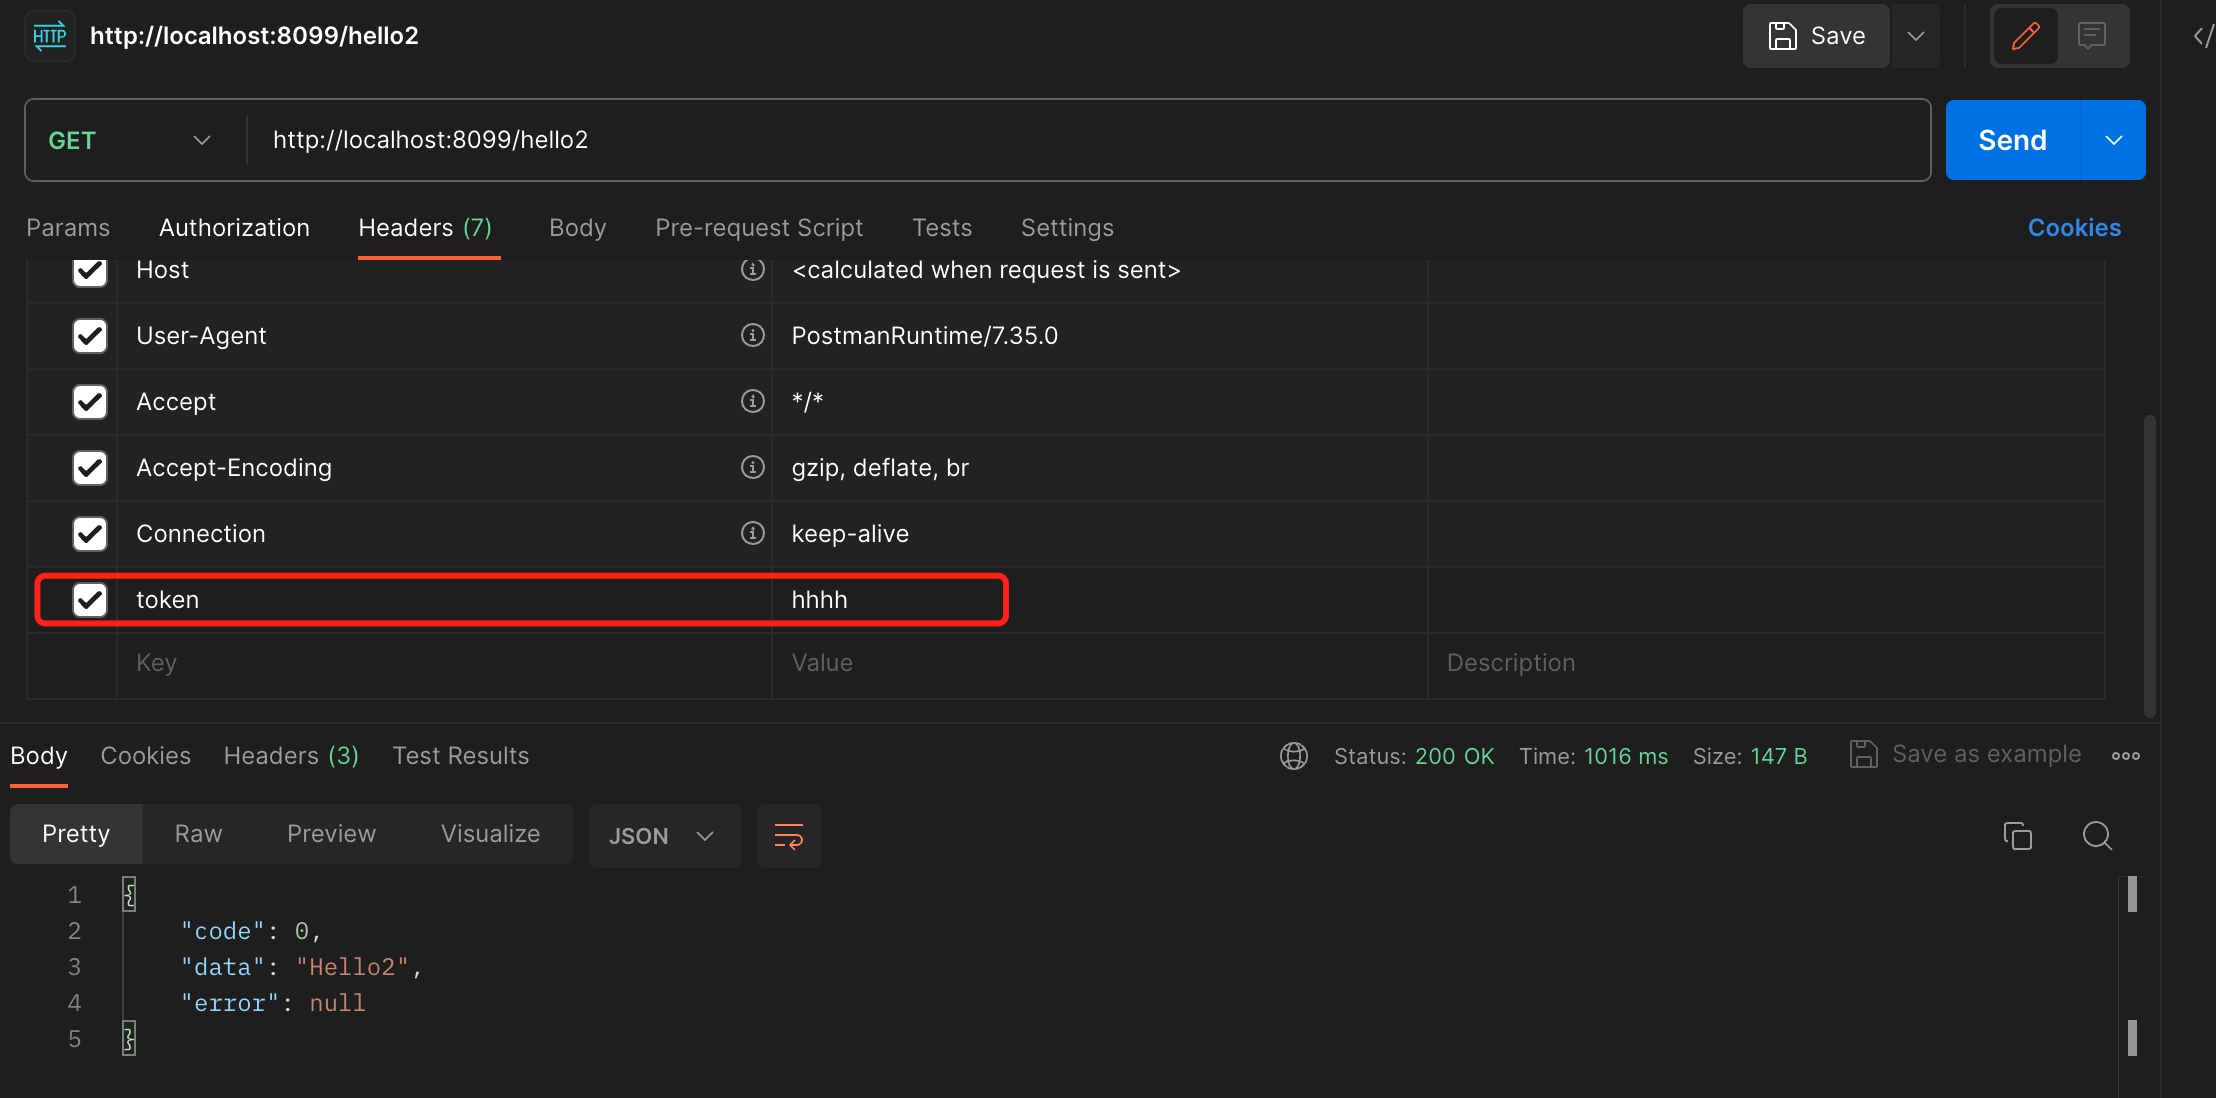
浏览器访问 hello1,由于没有 token,所以鉴权不通过,而通过 postman 访问 hello2,header 上加上 token,就可以请求通过。

小结
第一部分关于 web 框架就介绍到这里了,主要介绍了 actix-web 的使用:如何写一个接口、如何接收参数、如何返回 json 、如何通过中间件鉴权。